
Inspect your roof systematically by dividing it into three critical zones: the surface layer (shingles, tiles, or metal panels), the structural components (flashing, valleys, and penetrations), and the drainage system (gutters, downspouts, and scuppers). Start from ground level using binoculars to identify obvious damage like missing shingles, sagging sections, or displaced materials before climbing up for a closer examination. Document every finding with photographs, measurements, and detailed notes—this creates an invaluable record for insurance claims, property valuations, and tracking deterioration patterns over time.
Schedule inspections twice annually in spring and fall, plus after severe weather events, to catch minor issues before they escalate into costly repairs. A preventive maintenance approach can save property owners thousands in emergency repairs and preserve up to 20% more home equity according to recent real estate industry data.
Understanding what to inspect directly impacts your property’s insurability and resale value. Insurance providers often require evidence of regular roof maintenance, and buyers increasingly request detailed inspection reports during negotiations. Missing a critical defect during your inspection could mean denied claims when damage occurs or reduced offers when selling. Whether you’re conducting a DIY assessment or evaluating a professional’s work, knowing the components of a comprehensive roof inspection checklist empowers you to protect your investment, maintain optimal coverage, and make informed financial decisions about repairs versus replacement.
Why Your Roof Inspection Schedule Matters More Than You Think
Your roof inspection schedule isn’t just about preventing leaks—it’s a strategic financial decision that can save you thousands of dollars and protect your property investment. Regular, documented inspections create a paper trail that insurance companies scrutinize when processing claims, and savvy homeowners understand that this documentation can mean the difference between a fully covered claim and an expensive denial.
Insurance companies take roof maintenance seriously. When you file a claim for roof damage, adjusters will look for evidence that you’ve maintained your roof properly. Properties with documented inspection records demonstrating proactive care typically experience smoother claims processing, while those lacking documentation may face claim reductions or denials based on deferred maintenance arguments. This is especially critical for older roofs, where insurers are increasingly requiring inspection certificates before renewing policies.
Beyond insurance considerations, your inspection schedule directly impacts property value and marketability. When selling a home, recent roof inspection reports serve as powerful negotiating tools, demonstrating responsible ownership and reducing buyer concerns. Conversely, properties without inspection documentation often face buyer requests for pre-sale inspections or price reductions to account for unknown roof conditions. Mortgage lenders may also require roof inspections before approving loans, particularly for FHA or VA financing, making current documentation essential for smooth transactions.
Industry experts recommend scheduling inspections at least once per year, with additional checks following severe weather events. Spring and fall represent ideal timing—spring inspections catch winter damage before summer storms arrive, while fall assessments ensure your roof is prepared for harsh winter conditions. Properties in high-wind zones, coastal areas, or regions with extreme temperature fluctuations may benefit from twice-yearly inspections.
The cost of annual inspections, typically ranging from $150 to $400, pales in comparison to emergency repairs averaging $5,000 to $10,000 or full replacement costs exceeding $20,000. More importantly, consistent inspection records demonstrate the responsible property stewardship that insurance companies reward and homebuyers value, making your scheduled maintenance a sound investment in both protection and property equity.
Essential Exterior Roof Components to Inspect
Shingles, Tiles, and Surface Materials
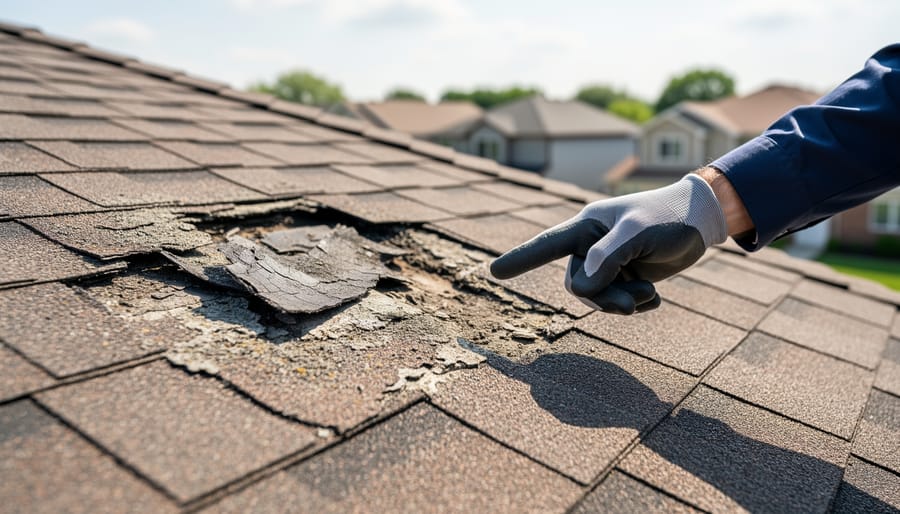
Your roofing material is your first line of defense against the elements, and different materials show wear in distinct ways. For asphalt shingles—the most common residential roofing—check for curling edges, missing granules (look for bald spots), cracks, or entirely missing shingles. These granules aren’t just cosmetic; they protect against UV damage, and their loss accelerates deterioration. From an investment perspective, asphalt shingles typically last 20-30 years, so if your roof is approaching this range and showing multiple issues, you’re looking at replacement rather than repair territory.
Tile and slate roofs offer longer lifespans (50-100 years) but require careful inspection for cracks, slippage, or broken tiles. While individual tile replacement is feasible, widespread damage may indicate underlying structural issues—a crucial consideration for property valuations and insurance coverage.
Metal roofing should be checked for rust, loose fasteners, and panel separation. Though durable, corrosion can compromise waterproofing and diminish curb appeal.
Here’s the financial reality: minor repairs (replacing a few shingles) are worthwhile investments, but when damage affects more than 25-30% of your roof surface, most insurance adjusters and real estate appraisers will flag this as requiring full replacement. At this threshold, continuing to patch becomes throwing good money after bad. Document everything with dated photographs—this evidence proves invaluable for insurance claims and provides transparency to potential buyers, protecting your property’s market value while avoiding future disputes.
Flashing and Seals
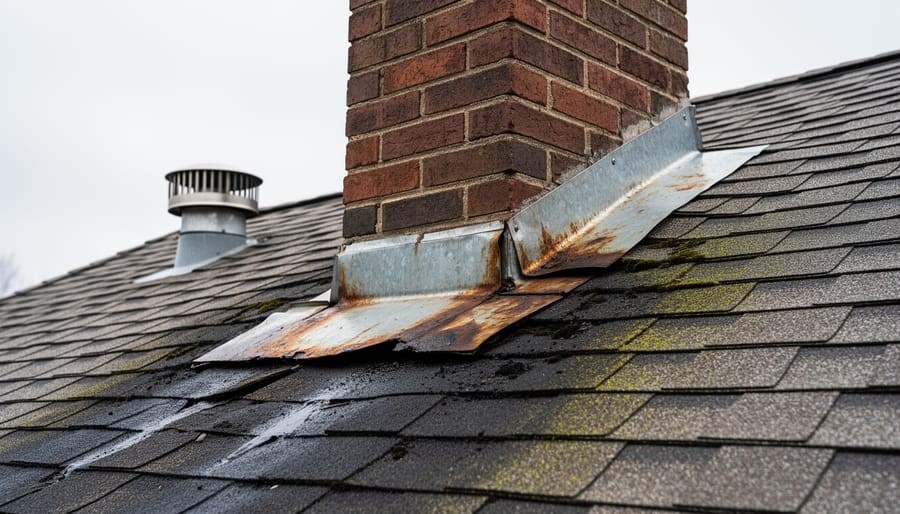
Flashing and seals deserve your closest attention during any roof inspection—these thin strips of metal or rubber around chimneys, vents, skylights, and valleys are your roof’s first line of defense against water intrusion. Despite their critical role, flashing failures account for a disproportionate number of insurance claims because they’re easily overlooked until damage becomes severe.
Check all flashing for rust, corrosion, or separation from the roof surface. Pay special attention to step flashing along chimneys and the cricket (the small ridge behind chimneys that diverts water). Even small gaps allow water to seep behind your roofing material, causing wood rot, mold growth, and insulation damage that can cost thousands to remediate.
Inspect pipe boot seals around plumbing vents—the rubber gaskets deteriorate from UV exposure and typically need replacement every 10-15 years. Cracked boots are inexpensive to replace but cause expensive damage when ignored.
Valley flashing requires particular scrutiny since water concentrates here. Look for standing water, debris accumulation, or any separation between the flashing and shingles. Document these areas photographically with close-ups and wide shots showing location, as insurers often dispute water damage claims when maintenance issues aren’t well-documented. Proactive flashing maintenance protects both your property value and insurability.
Gutters and Drainage Systems
Your gutters and downspouts serve as your roof’s first line of defense against costly foundation damage and property deterioration. During inspection, check for sagging sections, which indicate improper pitch or structural weakness. Look inside gutters for debris accumulation, rust spots, or separation at seams—all red flags that compromise water flow. Insurance claims often stem from water drainage issues that could have been prevented with proper gutter maintenance.
Examine downspouts to ensure they extend at least four to six feet from your foundation. Water pooling near your home’s base can lead to basement flooding, foundation cracks, and landscape erosion—problems that significantly impact property value and insurability. Test water flow by running a hose on the roof and observing drainage patterns.
Document any gutter problems with photos and notes. Properly functioning drainage systems protect your most valuable asset and can reduce insurance premiums by demonstrating proactive property maintenance. For homebuyers, well-maintained gutters signal responsible ownership and can strengthen negotiating position. Consider this a relatively inexpensive fix that prevents exponentially larger financial headaches down the road.
Ventilation Components
Proper ventilation keeps your roof healthy and your energy bills in check. Start by examining ridge vents along the roof peak for blockages or damage, then move to soffit vents under the eaves to ensure air can flow freely. These components work together to circulate air through your attic, preventing moisture buildup that leads to rot, mold, and premature shingle deterioration.
Poor ventilation is a silent budget killer. Trapped heat in summer forces your air conditioning to work harder, while winter moisture can damage insulation and structural elements. Insurance claims related to ventilation-related damage often face scrutiny since inadequate airflow is considered a maintenance issue. From a property value perspective, homes with proper ventilation systems command better prices and attract quality buyers who recognize the importance of energy efficiency improvements.
During your inspection, check for consistent airflow patterns, look for water stains in the attic indicating condensation problems, and verify that vents aren’t blocked by insulation or debris. Document the number and condition of vents, as this information proves valuable for appraisals and insurance assessments.
Structural Elements
Your roof’s structural integrity forms the foundation of your home’s protection and resale value. Start by stepping back from your property to check for visible sagging, which often appears as a dip or depression in the roof line. These warning signs shouldn’t be ignored—they typically indicate compromised rafters, trusses, or water damage that could cost thousands to repair.
Look for uneven roof planes where sections appear warped or misaligned. This irregularity might suggest foundation issues, deteriorating support beams, or improper installation. From inside your attic, inspect for daylight penetrating through boards or water stains on rafters, both red flags for structural weakness.
Why does this matter financially? Insurance claims involving structural damage often face intense scrutiny, and undisclosed issues can jeopardize coverage when you need it most. Additionally, structural problems discovered during a buyer’s inspection can tank property values by 10-20% or derail sales entirely. If you spot concerning signs, document them with dated photos and consult a licensed structural engineer immediately—early intervention prevents minor issues from becoming catastrophic, uninsurable problems.
Critical Interior Inspection Points
Attic Warning Signs
Your attic tells a story that your roof’s exterior might hide. During your inspection, head upstairs with a flashlight and look for these critical warning signs that could impact your property value and insurance coverage.
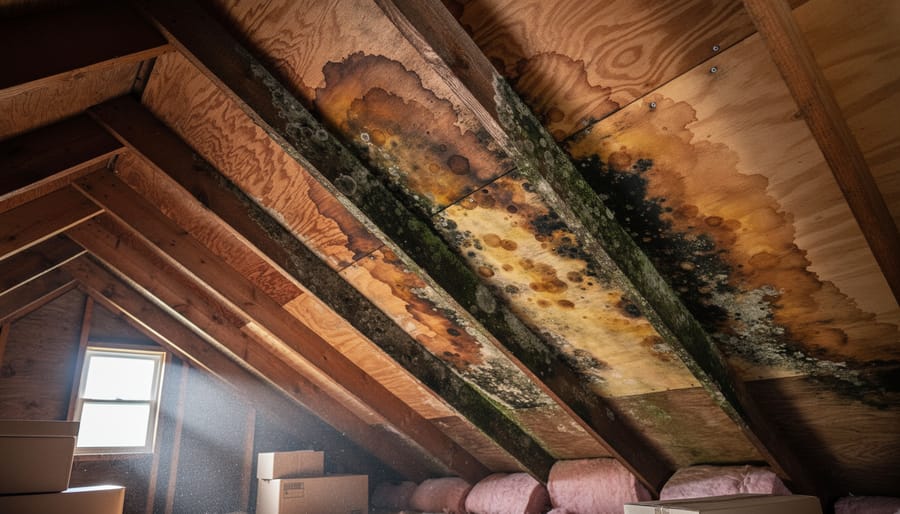
Water stains on rafters, sheathing, or insulation are red flags that demand immediate attention. These brownish or yellowish marks indicate active or past leaks, which can lead to structural damage costing thousands in repairs. More importantly, undisclosed water damage can derail real estate transactions and complicate insurance claims if you need to file later.
Mold growth appears as black, green, or white patches and signals excessive moisture—a serious health hazard and insurance liability. Many homeowners policies have strict mold exclusions, making early detection and remediation essential to avoid out-of-pocket expenses.
Check for daylight penetration through the roof deck. If you can see sunlight streaming through gaps or holes, water can definitely get in. This simple test often reveals problems before they become visible inside your living spaces.
Assess your insulation condition. Compressed, wet, or missing insulation reduces energy efficiency, increasing utility costs and making your property less attractive to buyers. Proper insulation also prevents ice damming in cold climates, which can void certain insurance coverages.
Finally, evaluate ventilation effectiveness by checking soffit and ridge vents for blockages. Poor ventilation traps heat and moisture, accelerating roof deterioration and potentially reducing your roof’s lifespan by years. Document all findings with photos and timestamps—this evidence supports insurance claims and provides negotiating power in real estate transactions.
Interior Ceiling and Wall Indicators
Sometimes the most telling signs of roof trouble aren’t visible from the outside at all. Instead, they announce themselves from within your living spaces, giving you early warnings that could save thousands in repair costs and protect your property value.
Start by examining your ceilings for water stains, which typically appear as yellowish-brown rings or irregular patches. These discolorations indicate active or past leaks that warrant immediate attention. Don’t dismiss old-looking stains as resolved issues—they may signal recurring problems that insurance adjusters will scrutinize during claims processing.
Check for peeling paint or bubbling texture on ceilings and upper walls, especially near roof lines. These subtle changes often precede visible water damage and suggest moisture infiltration that could compromise your home’s structural integrity. In finished attics or top-floor rooms, run your hand along walls to detect dampness or soft spots in drywall, which indicate ongoing water penetration.
Look upward for sagging areas in your ceiling, a red flag for serious structural concerns. Even slight drooping suggests compromised roof decking or ceiling joists, potentially from prolonged water exposure. This type of damage affects both your home’s safety and its appraisal value, making it a priority item for potential buyers and their inspectors.
Pay attention to mold growth or musty odors in upper-level rooms and closets. These aren’t just health hazards—they’re evidence of moisture problems that insurance companies may classify as maintenance-related rather than sudden occurrences, potentially affecting coverage. Document all findings with dated photographs, creating a timeline that demonstrates your diligence in monitoring your investment’s condition.
Your Complete Roof Inspection Checklist
| Component | What to Check | Red Flags | Action Frequency |
|---|---|---|---|
| Shingles/Surface | Missing pieces, curling edges, granule loss, cracks, blistering | Bare spots, widespread damage, shingles in gutters | Twice yearly, post-storm |
| Flashing | Rust, gaps, loose sections around chimneys, vents, skylights | Visible separation, water stains below, corroded metal | Annual inspection |
| Gutters/Drainage | Clogs, sagging, proper water flow, downspout positioning | Overflow during rain, standing water, foundation pooling | Quarterly cleaning |
| Interior Ceiling | Water stains, discoloration, soft spots, mold growth | Active dripping, brown rings, musty odors, peeling paint | Monthly visual check |
| Attic Space | Adequate ventilation, insulation condition, daylight penetration, moisture | Light coming through roof, dampness, compromised insulation | Seasonal inspection |
| Structural Elements | Sagging areas, uneven rooflines, damaged soffits and fascia | Visible dips, rotted wood, pest damage | Annual inspection |
This comprehensive checklist gives you a systematic approach to evaluating your roof’s condition while protecting your property investment. Start with exterior observations from ground level using binoculars to spot obvious damage without risking a dangerous climb. Document everything with photographs that include timestamps, which proves invaluable for insurance claims and property value assessments.
When examining your roof’s exterior, work methodically across each section. Look for asymmetry in shingle patterns or color variations that suggest uneven aging or previous repairs. Pay special attention to areas where different roof planes meet, as these joints are particularly vulnerable to leaks. For real estate transactions, undisclosed roof issues can derail deals or significantly impact negotiated prices, making thorough documentation essential.
Inside your home, check all ceiling areas during daylight hours, especially after heavy rainfall. Don’t overlook closets, bathrooms, and other spaces where moisture damage might hide. Your attic inspection should include checking insulation for compression or water damage, both of which reduce energy efficiency and increase heating costs by up to 25 percent according to energy audits.
Create a simple documentation system with dated photos stored in a dedicated folder. Note the location of each issue using reference points like “northeast corner near brick chimney” rather than vague descriptions. This record becomes a powerful tool when filing insurance claims, as it establishes a timeline of roof condition and demonstrates responsible homeowner maintenance. Many insurance providers offer premium discounts for homes with documented preventive maintenance programs.
For property investors and homebuyers, request copies of previous inspection reports and maintenance records. A well-maintained roof with documented care history adds tangible value during appraisals and provides negotiating leverage. Conversely, discovering deferred maintenance through this checklist process gives you concrete data for price adjustments or seller concessions before closing.
When to Call a Professional vs. DIY Inspection
Knowing when to tackle a roof inspection yourself versus calling in a professional can save you money while ensuring your home meets property maintenance safety standards. The answer largely depends on your comfort level with heights, the inspection scope, and your specific needs.
Homeowners can safely perform basic ground-level and attic inspections. Using binoculars to check for missing shingles, examining your attic for water stains, and clearing debris from gutters are all reasonable DIY tasks. These preliminary checks cost you nothing but time and can help you spot obvious issues before they escalate. However, walking on your roof without proper safety equipment or experience risks both personal injury and accidental roof damage.
Professional inspections become necessary in several scenarios. First, if you’re buying or selling a home, lenders and insurance companies typically require certified documentation from licensed inspectors. A professional report carries weight with underwriters who determine your homeowners insurance premiums and coverage eligibility. Second, when you spot potential damage but lack expertise to assess its severity, professionals provide accurate diagnostics that prevent costly misdiagnosis.
From a financial perspective, professional inspections typically cost between 300 and 500 dollars but can save thousands by identifying issues early. Insurance claims often require professional documentation to process, making that upfront investment worthwhile. Additionally, if your roof is over 15 years old or you’ve experienced severe weather events, professional assessment protects your property value and helps you negotiate insurance settlements effectively.
Consider your roof’s age, accessibility, and your transaction timeline. For routine maintenance monitoring, DIY works. For insurance documentation, property transfers, or suspected structural issues, invest in professional expertise. This balanced approach maximizes both safety and cost-efficiency.
Documenting Your Inspections for Insurance and Resale
Thorough documentation of your roof inspections creates a paper trail that can save you thousands of dollars in insurance disputes and significantly boost your home’s marketability. Think of it as creating a financial safety net for one of your property’s most valuable assets.
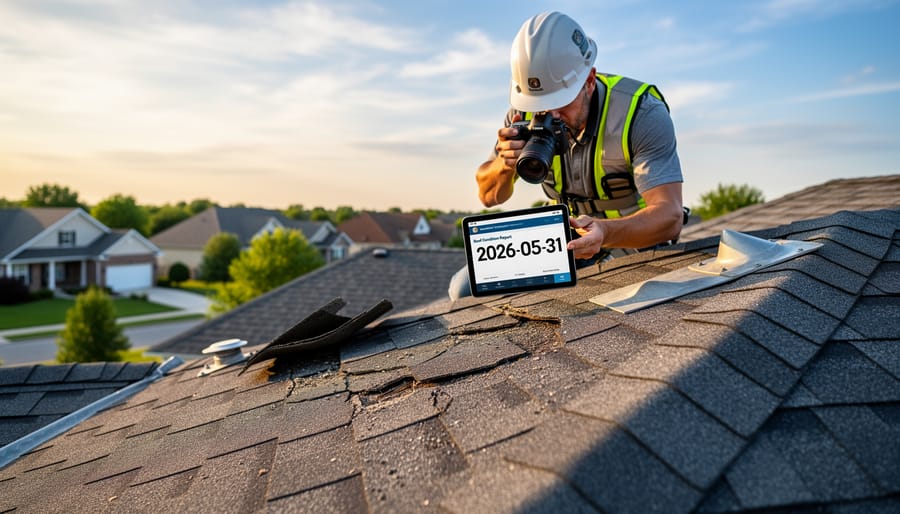
Start by photographing your roof from multiple angles during each inspection—take wide shots showing the entire roof and close-ups of specific areas like flashing, shingles, and potential problem spots. Date-stamp every image and store them chronologically in a dedicated digital folder. Modern smartphones make this simple, but consider using maintenance tracking software that automatically organizes photos, timestamps entries, and sends inspection reminders.
Your documentation should include the date of inspection, weather conditions, findings, repairs made, and contractor information with receipts. When you hire professionals, request detailed written reports with photo evidence—these carry more weight with insurance adjusters than homeowner notes alone. Keep receipts for every repair, no matter how minor, as they demonstrate proactive maintenance.
This comprehensive approach pays dividends when filing insurance claims. Adjusters often deny claims citing “deferred maintenance” or pre-existing conditions, but your documented inspection history proves you’ve maintained the roof properly and can pinpoint when damage occurred. During home sales, presenting prospective buyers with complete roof documentation removes uncertainty about one of their biggest concerns, often justifying a higher asking price and smoothing negotiations. Properties with well-documented maintenance histories typically sell faster and command premium prices because buyers perceive lower risk.
Consistency matters more than perfection—even basic notes and quarterly photos create valuable documentation that protects your investment.
Common Inspection Red Flags That Demand Immediate Action
During your roof inspection, certain warning signs should trigger immediate professional intervention. These red flags often signal problems that, if left unaddressed, can escalate into costly insurance claims or diminish your property’s market value significantly.
Widespread water stains on interior ceilings or walls indicate active leaks that require urgent attention. Water infiltration doesn’t just damage structural components—it can void portions of your homeowner’s insurance coverage if insurers determine the damage resulted from deferred maintenance. Document these issues immediately with photos and timestamps for insurance purposes.
Sagging sections or dips in your roofline represent serious structural concerns that pose safety hazards. This often signals deteriorated decking, compromised support beams, or excessive moisture damage. From a real estate perspective, structural issues like these will surface during buyer inspections and can derail transactions or drastically reduce offers.
Missing or severely damaged flashing around chimneys, vents, and valleys creates vulnerable entry points for water. These areas are common claim sources, and insurance adjusters specifically scrutinize flashing conditions when processing water damage claims. Addressing flashing problems proactively costs hundreds rather than thousands after water damage occurs.
Exposed or protruding nails indicate improper installation or natural material deterioration. While seemingly minor, exposed fasteners create puncture points where water enters, leading to gradual decking rot that compounds repair costs exponentially.
Granule loss exceeding 25 percent of the shingle surface, visible as bare spots or accumulation in gutters, signals the roof approaching end-of-life. Most insurance policies won’t cover replacement of roofs failing due to age, making timely replacement a crucial financial planning consideration. Contact roofing professionals immediately when encountering these red flags to protect both your investment and insurance coverage eligibility.
A systematic roof inspection checklist isn’t just another home maintenance task—it’s a strategic financial decision that protects one of your largest investments. By implementing a regular inspection schedule, you’re essentially creating a protective barrier around your property’s value while keeping insurance premiums in check and avoiding the financial shock of emergency repairs that can easily run into tens of thousands of dollars.
Think of your checklist as a financial early-warning system. Those minor issues you catch during a routine inspection—loose shingles, early signs of water damage, or compromised flashing—cost hundreds to fix today but thousands (or even tens of thousands) if left to deteriorate. More importantly, documented inspections strengthen your position with insurance carriers, ensuring claims get processed smoothly and your coverage remains intact when you need it most.
Whether you’re a homeowner protecting your family’s nest egg, a real estate professional advising clients, or an investor managing multiple properties, the message is clear: start your inspection routine today. Schedule your first comprehensive inspection within the next 30 days, mark your calendar for biannual reviews, and maintain detailed documentation. Your roof—and your bank account—will thank you.